


How to Start a Beehive: A Beginner's Step-by-Step Guide

Last Updated: November 19, 2026
Quick Summary
To start a beehive, choose a sunny, well-drained site close to you, confirm local registration rules, and buy the core equipment before ordering bees. Install a package or nucleus colony in spring, once nights stay above freezing, then inspect every week or two.
Place the hive within easy walking distance so inspections stay quick and consistent.
Confirm registration requirements with your state department of agriculture before setting up.
Buy hive bodies, frames, covers, smoker, hive tool, veil and gloves before bees arrive.
Install packages or nucs in April or May, feeding 1:1 syrup until the colony stops taking it.
Inspect every seven days after installation, and every seven to ten days during the growing season.
Table of Contents
Choosing Your Location and Setting Up the Apiary
Starting a beehive begins with picking the right spot. Most new beekeepers focus on gear first, but location decides how easy your hive will be to work for years.
Many beginners assume hives belong in the back 40, away from everything. That idea sounds peaceful, but it makes routine checks a chore.
Look for these basics when you choose a site:
Morning sun, which warms the colony early
Dry ground with good drainage
A flat, stable surface for the hive stand
A nearby water source the bees can reach
Flowering plants within a short flight
Before you buy anything, check local rules. Beekeepers in many areas must register hives with state apiary inspectors.
Watch out: Placing a hive where it blocks a path or faces a neighbor's door invites conflict.
Beekeeping for Beginners: The Equipment You Actually Need
You do not need a full warehouse of gear to start, but you do need to know what each piece does before you buy it.
Your core list, with the job each item performs:
Hive body with frames and foundation, the brood chamber where the queen lays and workers raise young. Most beginners start with one deep or one medium box and add a second before the colony fills the first.
Bottom board and hive stand, the bottom board is the floor and entrance reducer; the stand keeps the box off damp ground and lifts it to a comfortable working height, roughly 18 to 24 inches.
Inner cover and outer telescoping cover, the inner cover gives bees a crawl space above the frames and accepts a feeder; the outer cover sheds rain and snow.
Smoker and fuel, a stainless smoker with a wire guard and a bag of burlap or wood pellets. Practice lighting it before your bees arrive, not on installation day.
Hive tool, a flat pry bar for separating boxes and prying frames. Buy two; they are easy to set down in the grass and lose.
Protective gear, at minimum a veil and gloves; a jacket or full suit is a comfort upgrade, not a requirement.
Feeder, an entrance feeder, top feeder, or frame feeder for sugar syrup during establishment and dearth.
Queen excluder (optional in year one), keeps the queen out of honey supers; many beginners skip it until they add a second box.
Costs add up quickly, so plan the budget before you shop.
Stage your purchases in this order so nothing sits idle:
Before ordering bees, hive body, frames, foundation, bottom board, stand, covers, smoker, hive tool, veil, and gloves. Assemble and paint the boxes so they are ready the day bees arrive.
Two to three weeks before installation, feeder and sugar for syrup. Mix only what you will use in a week.
After the first inspection, a second box and frames, once you see the colony drawing comb and the queen laying across multiple frames.
Before your first fall, entrance reducer, mouse guard, and any winter wrap or insulation appropriate to your climate.
Assembly matters as much as the purchase. Square the boxes, nail or screw the joints, and check that frames hang level so bees draw straight comb.
Protective Clothing and Safe Handling
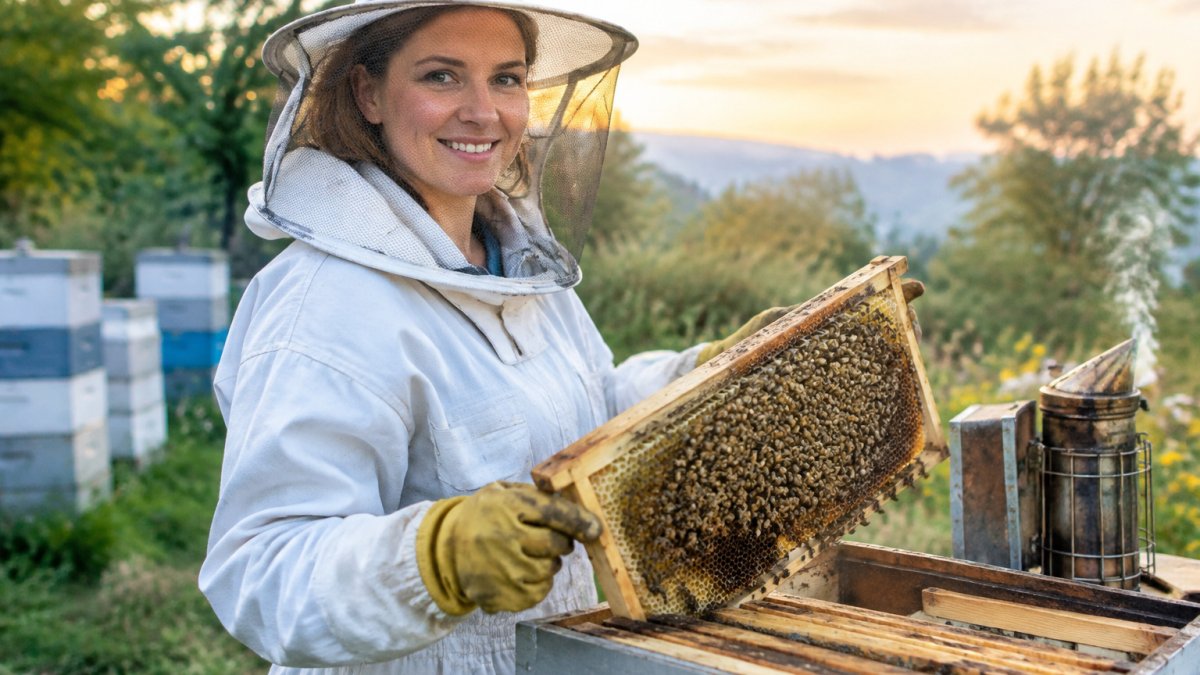
Protective gear builds confidence, especially when stings make you nervous. A veil and gloves are the minimum for most beginners. Our guide to beginner beekeeping protective clothing shows what to buy and how each piece fits.
Handle frames slowly and avoid sudden movements. Bees respond to vibration and quick motion, so work at a calm pace.
Wear light colors, avoid strong perfumes, and never work a hive when you feel rushed. Good habits protect both you and the bees.
Getting Your First Colony: Buying Bees Versus Other Options
Your first colony can come from a package, a nucleus colony, or a local swarm. Each option has trade-offs in cost, speed and risk.

Packages give you a set number of worker bees and a queen in a screened box.
You can also try a swarm, but it takes more skill and local knowledge.
Source your bees from reputable local suppliers when possible.
Watch out: Buying bees with no plan for feeding and inspections can lead to problems in the first year.
The Best Month to Start a Beehive and a First-Year Calendar
Timing matters more than most beginners expect.
A month-by-month first-year calendar keeps you from guessing what to do next.
January-February (ordering window): Place your bee order with a reputable supplier, confirm local registration and setback rules, assemble and paint equipment, and site the hive. Read one beginner book cover to cover.
March (pre-installation): Set the hive stand and level it, install the entrance reducer, and mix your first batch of 1:1 sugar syrup. Attend a local club meeting or beginner course if one is available.
April (installation): Install the package or nuc on a mild, calm day. Feed 1:1 syrup continuously until the colony stops taking it. Inspect at seven-day intervals to confirm the queen is laying and comb is being drawn.
May (first expansion): Check brood pattern and space. Add a second box when roughly seven of ten frames are drawn. Watch for queen cells, which signal swarm preparation.
June (growth and swarm watch): Inspect every seven to ten days. Add honey supers if the colony is strong and nectar is flowing. Provide shade and water during heat.
July (dearth management): Many areas see a nectar gap. Monitor stores and feed if the colony is light. Check for pests such as varroa mites and small hive beetles.
August (late-summer assessment): Evaluate whether the colony has enough stored food to carry through winter. In northern areas, this is the month to begin fall feeding if stores are short.
September (winter preparation begins): Reduce the entrance, install a mouse guard, and confirm the queen is still laying. Treat for mites if monitoring shows thresholds are exceeded, following label directions.
October (final stores check): Weigh or heft the hive to estimate stores. Feed 2:1 syrup if the colony is light. Remove extra supers and consolidate the brood chamber.
November (wrap and settle): Add insulation or a windbreak appropriate to your climate. Limit inspections to quick external checks on mild days.
December (hands-off): Do not open the hive. Clear snow from the entrance and check for signs of activity on warm afternoons.
For feeding, remember that bees rely on more than sugar water. Pollen and natural forage provide protein and nutrients that syrup cannot replace.
Inspect your hive every one to two weeks during active seasons. Regular checks help you catch problems like crowding, disease signs, or a failing queen before they grow. Keep brief notes after each inspection, date, frames drawn, brood pattern, stores, and any concerns, so you can spot trends across the season.
Watch out: Following a calendar from a different climate can do more harm than good.
The article lays out when to install bees and what to do each month in the first year.
Month | Main task | Note |
January-February | Order bees, confirm registration, assemble equipment | Ordering window |
March | Level stand, install entrance reducer, mix 1:1 syrup | Pre-installation |
April | Install package or nuc, feed 1:1 syrup | Inspect every seven days |
May | Add second box when about seven of ten frames are drawn | Watch for queen cells |
June | Inspect every seven to ten days, add honey supers | Provide shade and water |
September | Reduce entrance, install mouse guard, treat for mites if needed | Winter preparation |
October | Heft hive, feed 2:1 syrup if light | Final stores check |
December | Do not open the hive | Hands-off |
Booking Your First Hive Setup and Starter Kit
If you want a faster start, a ready-made starter setup takes much of the guesswork out of the first purchase. Pricing depends on the kit, quantity and delivery, so check our website for current options or request a quote before you buy.
For a hive built to suit beginners, take a look at our log cabin style bee hive. Its design removes the side handles to keep the box comfortable for bees during cold and hot months, and the top opens for easy access.
Once your hive is in place, plan what your bees will eat between flower seasons. Our guide on what bees eat besides honey explains feeding options for each part of the year. And to make your apiary more inviting, see our list of plants that attract honey bees to your garden.
Starting a beehive takes planning, patience and a little courage. Choose a good site, buy the essentials, install your bees at the right time, and keep up with inspections. With that foundation, your colony has every chance to thrive.
Frequently Asked Questions
How much does it cost to start beekeeping?
Costs depend on how many hives you start with, whether you buy used or new equipment, and whether you buy bees or a complete starter kit. Protective gear, a hive tool, and a smoker are the core items. For current pricing and kit options, check the That Crazy Bee Guy website or request a quote, since prices vary with quantity and delivery.
What month is best to start a beehive?
Spring is the usual time to start a new hive in most of the United States, when package bees and nucleus colonies are available and the weather is warming and flowers are opening. Starting in spring gives a colony the most time to build comb, store honey, and prepare for winter. Local conditions, such as your last frost date and the availability of bees from suppliers, should guide the exact timing. Check with a local beekeeping association for the window in your area.
Can you start a beehive without buying bees?
Yes. Some beekeepers start with a swarm captured from an existing colony or with a split taken from an established hive. Swarm traps and swarm lures can attract wild colonies, and local beekeeping associations sometimes connect new keepers with swarms that need a home. Each method has tradeoffs in colony health, timing, and reliability, so a beginner should ask an experienced mentor which option is realistic in their area before waiting on a swarm.
How many bees should a beginner start with?
Beginners are generally advised to start small with one or two colonies. Two hives let you compare colony behavior and health, and if one struggles you still have a working colony to learn from. Starting with more hives than you can inspect every one to two weeks can quickly become overwhelming. Once you are comfortable with inspections and seasonal management, you can expand gradually.


Comments